
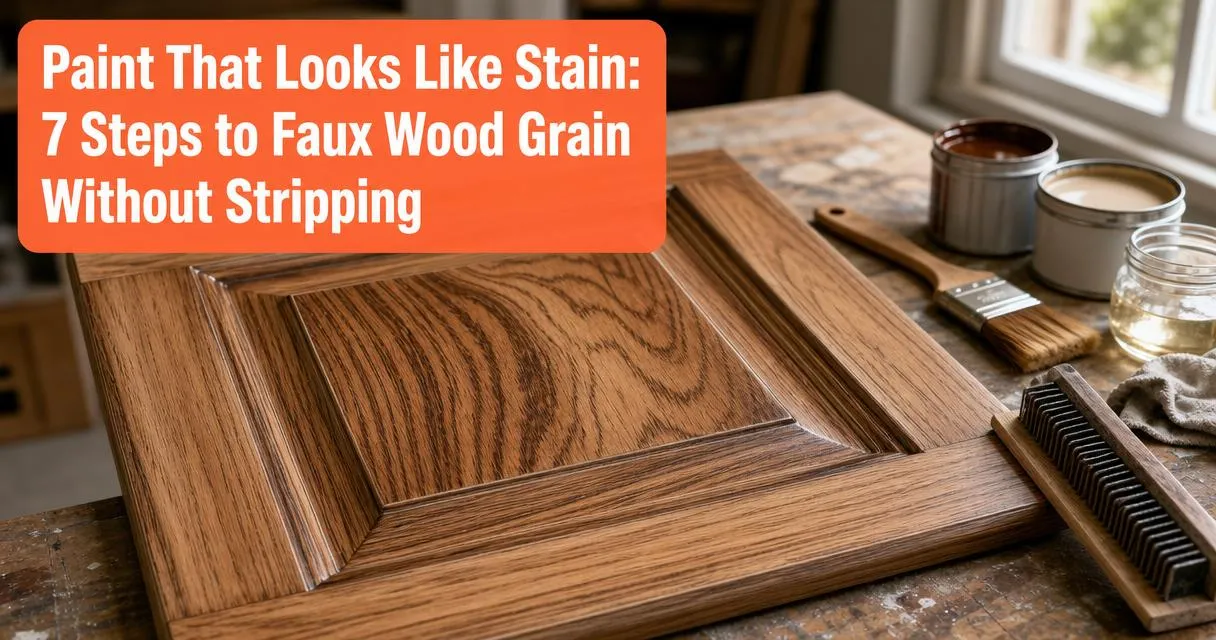
Most people strip old finish off furniture or doors before staining, but you don’t have to. You can mimic real wood stain using nothing more than latex paint mixed with clear glaze, brushed over a simple base coat. This method works on previously painted surfaces, bare wood, even metal doors.
Key Takeaways
- Faux stain is latex paint mixed with clear glaze in roughly a 1:4 ratio, applied over a base coat to mimic wood grain
- Works without stripping on previously painted furniture, metal doors, cabinets, and trim
- Requires no chemical strippers or specialized woodworking tools, just paint supplies and a wood-graining tool
- You can create multiple shade variations by adjusting the paint-to-glaze ratio or layering a second tone
- A water-based clear topcoat protects the finish and makes it durable enough for high-touch surfaces like doors and drawer fronts
- Glaze extends your working window so you can drag grain patterns before the paint dries
- Test on scrap boards first to prevent wasted effort on the actual piece
Related Reading
Comparisons and top picks for paint-and-primer products to simplify prep and ensure adhesion on wood when creating a…
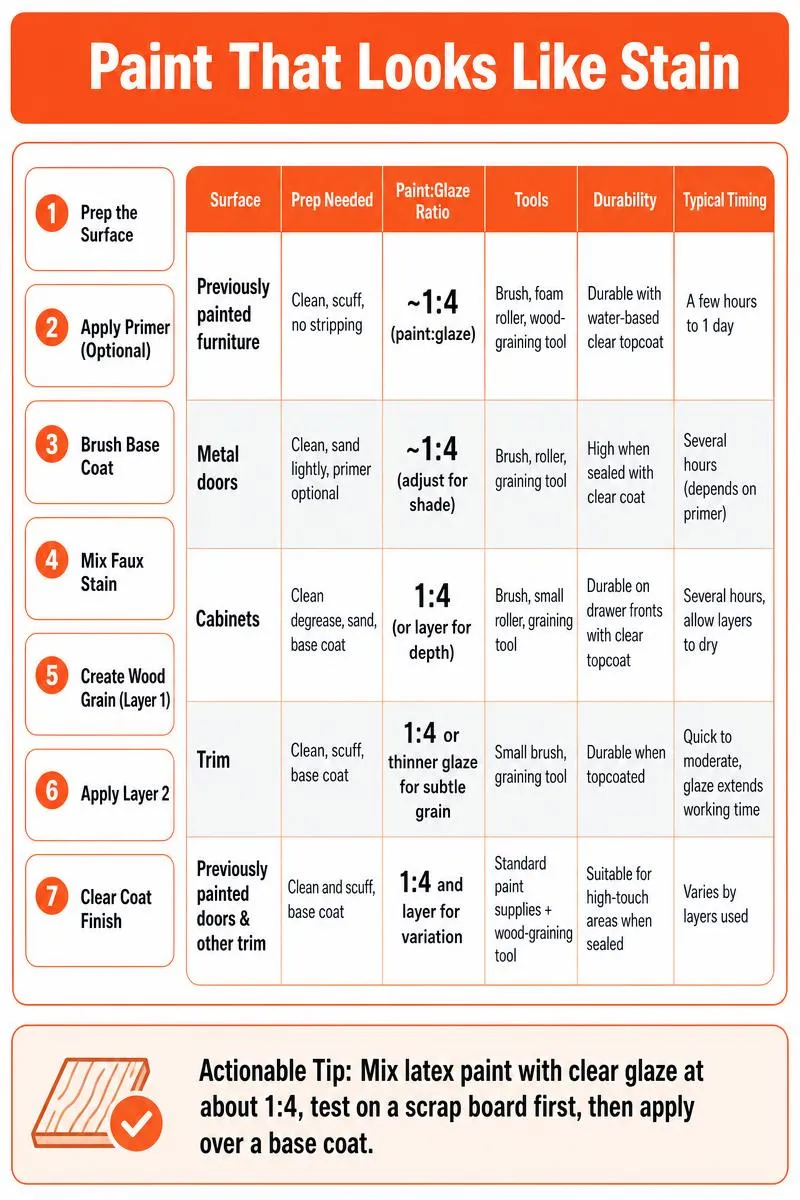
Paint That Looks Like Stain at a Glance
| Surface | Prep Needed | Paint:Glaze Ratio | Tools | Durability | Typical Timing |
|---|---|---|---|---|---|
| Previously painted furniture | Clean, scuff, no stripping | ~1:4 (paint:glaze) | Brush, foam roller, graining tool | Durable with water‑based clear topcoat | A few hours to 1 day |
| Metal doors | Clean, sand lightly, primer optional | ~1:4 (adjust for shade) | Brush, roller, graining tool | High when sealed with clear coat | Several hours (depends on primer) |
| Cabinets | Clean, degrease, sand, base coat | 1:4 (or layer for depth) | Brush, small roller, graining tool | Durable on drawer fronts with clear topcoat | Several hours, allow layers to dry |
| Trim | Clean, scuff, base coat | 1:4 or thinner glaze for subtle grain | Small brush, graining tool | Durable when topcoated | Quick to moderate, glaze extends working time |
| Previously painted doors & other trim | Clean and scuff, base coat | 1:4 and layer for variation | Standard paint supplies + graining tool | Suitable for high‑touch areas when sealed | Varies by layers used |
What You’ll Need
You’ll need a small set of painting supplies and one specialty tool to pull off the grain effect.
Essential supplies:
- Latex paint in your chosen stain color works as the base for your faux stain, with brown, walnut, mahogany, or gray tones performing best
- Clear acrylic glaze medium (Floetrol or similar) extends your working window for dragging grain patterns
- Latex primer creates a neutral foundation if you’re covering bare wood or a dark existing finish
- Base coat latex paint in a lighter wood tone shows through for contrast with the faux stain layer
- A wood-graining tool (rubber rocker with grooves) creates the wavy grain pattern in wet glaze
- Fine-grit sandpaper (220-grit) scuffs the finish for adhesion before priming or painting
- A tack cloth removes sanding dust before you start painting
- Synthetic brushes, one for the base coat and one for the faux stain mixture, apply paint smoothly
- A water-based clear topcoat in satin or semi-gloss seals and protects the surface
Helpful but skippable:
- A drop cloth protects your work area from spills and drips
- Disposable gloves keep your hands clean during application
- Sample boards or scrap wood let you test your mixture and grain pattern before committing
Step-by-Step Guide
This process builds layers, so each step depends on the one before it drying completely.
1. Prep the Surface
Clean the piece thoroughly with a degreaser or TSP substitute to remove oils, dirt, and old wax. Lightly sand the entire surface with 220-grit sandpaper to scuff the finish for adhesion. Remove all hardware like hinges, knobs, and pulls.
Wipe down with a tack cloth to remove sanding dust. Let the surface dry completely before moving on.
2. Apply Primer (Optional)
If you’re working over bare wood or a very dark existing color, apply bonding primer to create a neutral foundation. Zinsser Bulls Eye 1-2-3 or Kilz 2 both work well. Skip this step if you’re painting over a light-colored existing finish.
Let the primer dry for at least two hours, or according to the product label.
3. Brush On Base Coat
Apply a coat of latex paint in a light wood tone that will show through the faux stain. Tan, beige, or cream shades work as neutral bases. You can also use a pale gray for driftwood effects or a peachy tone for warmer finishes.
Brush in the grain direction you plan to create, typically following the longest dimension of boards or panels. Let this dry for at least four hours, longer in humid conditions.
4. Mix Your Faux Stain
Combine one part latex paint in your chosen stain color with four parts clear glaze in a clean container. Stir thoroughly until the mixture is uniform with no streaks.
The glaze thins paint for workability and extends drying time. This gives you the open window you need to drag the graining tool before the paint sets.
- If the mixture looks too thick or opaque, add a tablespoon of water at a time until it flows smoothly off your brush
- If it looks too watery and translucent, add more paint to the mixture
5. Create Faux Wood Grain (Layer 1)
Brush a generous coat of your paint-glaze mixture onto one section of the piece. Work in manageable areas about two feet wide.
While the mixture is still wet, drag the graining tool through the glaze in long, steady strokes following the direction of your base coat. Rock the tool gently as you pull to create the characteristic wavy grain pattern.
Wipe the tool clean between strokes with a damp rag. Work quickly enough that the glaze doesn’t start setting up before you finish each section. Let this first layer dry completely, at least two to three hours.
6. Apply Layer 2 Mixture
For added depth, mix a second batch of faux stain using a slightly darker or different tone of paint with the same glaze ratio. Brush this on more sparingly than the first layer, focusing on areas where natural wood would show darker grain or figure.
You can drag the graining tool again or simply brush it on and wipe selectively with a rag. This step is optional but adds realistic dimension that a single layer can’t achieve. Let it dry completely.
7. Clear Coat the Finish
Once all faux stain layers are fully dry, apply a water-based polyurethane or clear topcoat in satin or semi-gloss sheen. Use long, even brush strokes and avoid over-brushing, which can leave streaks.
Two coats protect high-touch surfaces like tabletops or door fronts. Let each coat dry according to the label, typically four to six hours. Lightly sand between coats with 320-grit sandpaper if you see any roughness.
How Long Does It Take?
- Prep work, cleaning, sanding, and applying the base coat take about half a day including drying time. You can prep in the morning and apply the base coat in the afternoon, then let it dry overnight.
- Faux stain layers need two to four hours of active work, plus drying time between each layer. Plan on one full day for both graining passes if you’re doing a second tone.
- Clear coating requires overnight drying after the final coat. Full cure takes up to a week depending on the topcoat product.
- The piece will be safe to handle after 24 hours. Avoid heavy use early to prevent damaging the finish.
Related Reading
Reviews of rollers and nap sizes suited to deck and exterior wood surfaces for smoother application of stain-like paint.
Common Mistakes
- If your mixture looks opaque and hides the base coat completely, the grain tool won’t reveal much contrast. Thin it with water until you can see through it slightly on a test board.
- If the mixture is too thin, it leaves barely any color behind when you drag the tool. Add more paint to the glaze mixture when your faux stain looks washed out.
- Skipping the base coat means you’re creating grain on bare primer or the original surface color. The entire technique depends on contrast between layers, so don’t skip this step.
- Rushing drying time causes wet glaze to blend into previous coats. You’ll get a muddy, blurred look instead of distinct grain lines. Let each layer dry to the touch.
- Stiff-bristled brushes leave harsh, unnatural grain lines in the glaze. Use a soft synthetic brush that lays the mixture down smoothly, and let the graining tool handle the texture.
FAQs
Is there a paint that mimics stains?
Yes, specialty products like Retique It Liquid Wood are formulated to look like stain when brushed on. You can achieve nearly identical results by mixing regular latex paint with clear glaze. The DIY method costs less with more control over the final color since you’re not limited to pre-mixed shades.
Can I make paint look like stain?
Absolutely. Mix one part latex paint in a wood-tone color with four parts clear glaze, apply it over a lighter base coat, and drag a wood-graining tool through the wet glaze. The key is the glaze, which thins paint for grain work and extends drying time so you can manipulate it before it sets.
Is there a paint that resembles wood?
Faux wood-grain finishes using paint and glaze can look remarkably realistic, especially on flat surfaces like doors, drawer fronts, and furniture panels. The effect won’t fool anyone at close range on complex millwork, but it’s convincing enough for most applications and holds up better than actual stain on metal or previously painted surfaces.
What paint colors look like stained wood?
Warm browns like burnt umber, raw sienna, and chestnut mimic traditional stains like oak and walnut. Cool grays mixed with taupe create weathered or driftwood finishes. For mahogany or cherry tones, use reddish-brown paints. Test your chosen color on a sample board first, since the glaze lightens the color significantly.
Can I use faux stain on exterior surfaces?
You can, but you’ll need exterior-grade products. Use exterior latex paint, an exterior clear glaze additive, and an exterior topcoat rated for UV protection. The technique works the same way, but outdoor faux finishes fade faster outdoors and require more maintenance than real stain or solid paint.
Does faux stain hold up as well as real stain?
On previously painted surfaces or metal, faux stain actually holds up better because real stain won’t penetrate or bond properly to sealed finishes. On bare wood, traditional stain penetrates deeper and lasts longer. Faux stain protected with a good topcoat holds up well indoors for years before needing touch-ups.
What’s the difference between Retique It Liquid Wood and DIY faux stain?
Retique It is a pre-mixed product designed specifically for creating faux wood grain. DIY faux stain uses standard latex paint and glaze you mix yourself. Retique It offers convenience but costs more per ounce and limits you to their color range. DIY mixing gives unlimited color options and works out cheaper for larger projects.
Final Verdict
Faux staining gives you a realistic wood-grain look on surfaces where traditional stain won’t work. You don’t need to strip anything or invest in specialty tools beyond a graining rocker. The paint-and-glaze method costs less than refinishing and holds up well on doors, furniture, and trim when protected with a clear topcoat.
Start with a small piece or a sample board to dial in your mixture ratio and practice the graining motion before committing to a larger project. Once you get the feel for it, you can finish a door or dresser in a weekend.
Based in Denver, Colorado, if you’d rather leave the faux-stain finish to experienced painters, our team handles furniture, doors, and trim with techniques that hold up to daily use. We can match any wood tone and deliver a consistent, durable result across multiple pieces, learn more about those options on our interior painting services. Reach out for a free estimate in the Denver metro area at 720-831-8998.
Related Reading
Best uv resistant exterior paint
Top exterior paints rated for UV resistance and color retention—important if you’re using paint to mimic stain on…